What's the secret to perfectly glazed carrots?
The quest for truly magnificent glazed carrots—those tender, jewel-toned morsels glistening with a sticky, sweet-and-tangy coating—often feels like chasing a culinary phantom. Many home cooks end up with either mushy, waterlogged vegetables or a grainy, separated mess. The perfect glaze isn't about one magic ingredient; it’s a precise dance between preparation, chemistry, and timing. It requires understanding why some methods yield a thin, watery puddle while others produce that coveted, glass-like sheen. [2]
# Carrot Prep
The foundation of any great side dish starts before the heat even hits the pan. For glazed carrots, the preparation of the carrot itself is non-negotiable, as it directly impacts how the final glaze adheres and how the texture holds up to the reduction process. [3]
# Sizing Matters
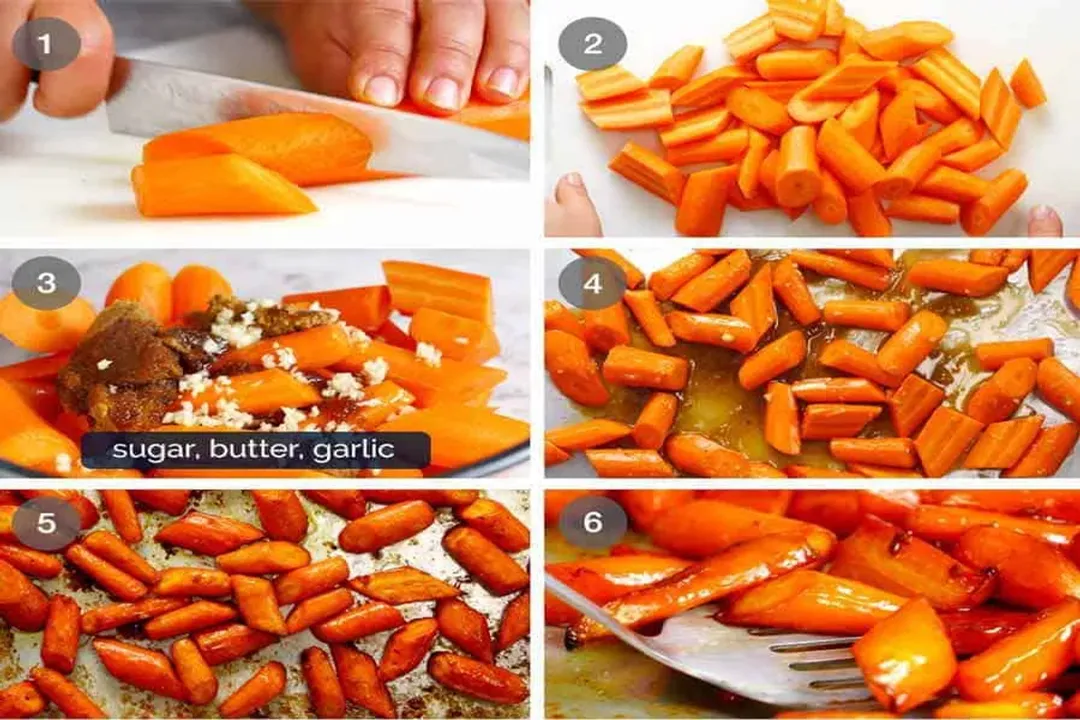
Carrots come in vastly different sizes, and inconsistency in cutting is a fast track to uneven cooking. If you have small, skinny carrots alongside large, thick ones, the small ones will turn to pulp while the large ones remain stubbornly raw when the sauce is finally ready. [9] The general consensus suggests aiming for pieces that are roughly the same size, whether you choose coins, diagonal slices, or sticks. [4][7] For sticks, aiming for about a half-inch thickness is a common recommendation. [10] If you are using very large carrots, cutting them lengthwise first, perhaps into halves or quarters, before dicing them to a uniform size ensures that the heat penetrates evenly. [3]
# Initial Cook
The most critical step that separates a good glazed carrot from a spectacular one is the pre-cooking method. You must soften the carrots before introducing them to the final sugary glaze. If you add raw carrots directly to a simmering sugar mixture, the sugar will likely crystallize or burn before the vegetable reaches the desired tenderness. [5][9]
There are three main established paths for this initial softening: boiling, steaming, or roasting.
Boiling is perhaps the most common approach, but it carries the highest risk of waterlogging the carrots, diluting their natural flavor, and causing a texture collapse later. [2] If you boil, use just enough water to cover them, and season the water well with salt. You are aiming for almost tender—firm to the bite but not raw—as they will finish cooking in the glaze. [1][8]
Steaming offers better flavor retention since the carrots aren't submerged, making it a favorite technique for maintaining structural integrity. [2]
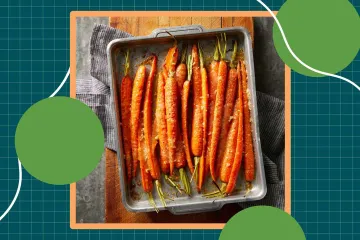
Roasting, while taking longer, adds a subtle layer of caramelization before the actual glazing begins, which deepens the overall sweetness. [3] If you opt to roast first, toss them lightly with oil, salt, and pepper, and cook them until they are just beginning to soften at the edges.
An often-overlooked intermediate step involves letting the pre-cooked carrots rest. If you boil or steam them, drain them thoroughly and let them sit for ten to fifteen minutes. Allowing residual moisture to evaporate slightly before they hit the glaze prevents that water from watering down your carefully constructed sauce later on. [9] This step acts as a buffer against the dreaded thin, separated glaze.
# Glaze Components

The glaze itself is a balance of three core elements: the sweetener, the fat, and the acid. Getting the ratio right ensures a shiny finish rather than a sticky, hard candy shell or a thin syrup. [2]
# Sweeteners
The backbone of almost every classic glaze is sugar. Brown sugar, white granulated sugar, honey, or maple syrup are the usual suspects, and the choice impacts the final color and depth of flavor. [1][7][10]
- Brown Sugar: Offers a deeper, almost molasses-like flavor and a richer color. [1]
- Honey or Maple Syrup: Both provide distinct, complex flavors. Honey tends to create a slightly stickier final product, while maple syrup pairs exceptionally well with the earthy sweetness of the carrot. [7]
- Granulated Sugar: While it works, it often needs an acid component to prevent it from crystallizing into a gritty texture. [2]
Many successful recipes call for a combination, such as brown sugar mixed with honey or maple syrup, to balance the flavor profile. [1][7]
# The Fat Element
Butter is the undisputed champion here. It adds richness, helps carry the flavor compounds, and is essential for achieving that glossy sheen. [1][4] Without sufficient fat, the glaze tends to dry out or crystalize instead of gently coating the vegetables.
# Introducing Acidity
This is often cited as the true "secret" beyond simple cooking technique. Pure sugar and fat alone yield a flat, overly sweet product. A bright, acidic element is needed to cut through the richness and make the sweetness pop. [4]
The most common and effective acid is the juice of an orange. [4] Orange juice not only provides necessary liquid for the reduction but its citric acid prevents the sugars from seizing up while brightening the overall taste. [5] Some cooks argue that a small splash of white vinegar or lemon juice can substitute or supplement the orange, depending on the desired flavor profile. [2]
My own experience suggests that the temperature at which the acid is introduced matters. Adding cold orange juice to a hot butter/sugar mixture can shock the components, sometimes leading to separation. It’s better to warm the juice slightly, or slowly whisk it into the melted butter/sugar mixture over medium heat. [9]
# The Reduction Stage
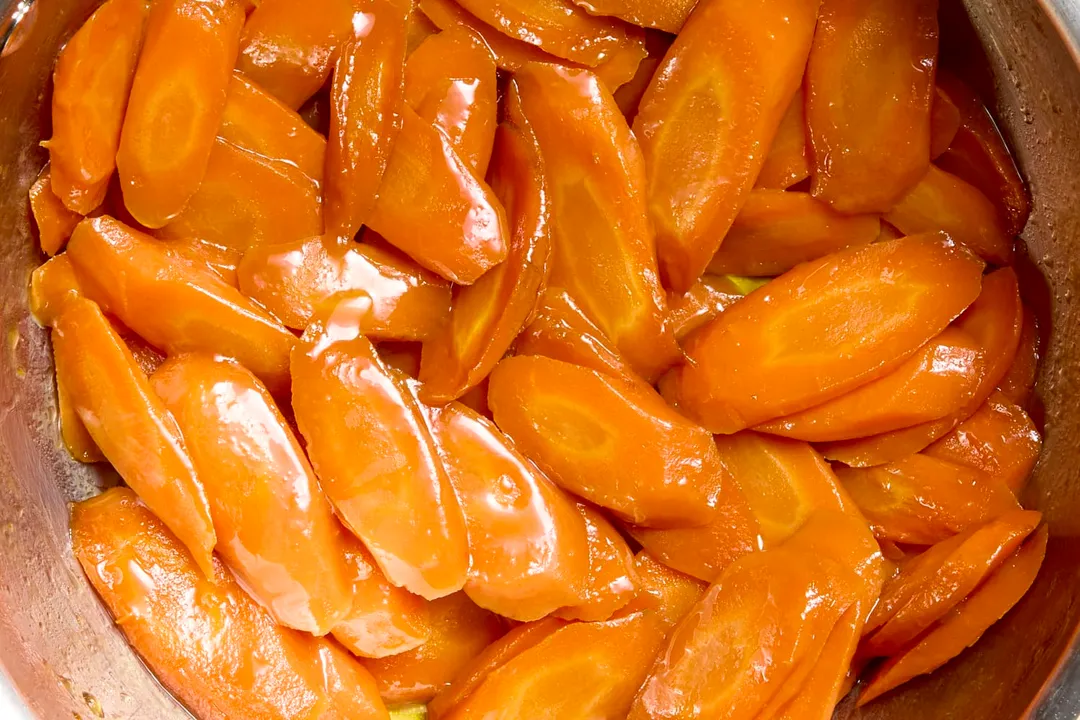
Once the carrots are pre-cooked and your glaze components are combined in the pan, the magic happens during the reduction, which thickens the liquid into a true glaze. [6]
# Liquid Management
When combining the sweetener, fat, and liquid (like orange juice or water/stock), you must resist the urge to add too much liquid initially. [8] The goal is to create a syrup that clings to the carrots, not a watery sauce that boils them a second time. The final volume of the glaze should be just enough to generously coat the vegetables without drowning them. [2]
If you are using stock instead of water for initial cooking (as an alternative to the standard boil/steam), be mindful of the salt content. A flavorful chicken or vegetable stock adds depth that plain water cannot match, but it means you should significantly reduce or eliminate added salt in the glaze itself. [8]
# Heat Control
This is where expertise comes into play. You generally start melting the butter and sugar over medium heat. Once combined, you introduce the liquid and bring the mixture to a simmer. [1] The key is to maintain a steady, gentle simmer that allows the water content to evaporate, concentrating the sugars and thickening the mixture. This is not a high-boil situation designed to cook the carrots; it's a slow reduction process. [3]
The sauce is ready when it visibly thickens and coats the back of a spoon, or when it starts clinging to the carrots instead of pooling heavily at the bottom of the pan. [6][8] This usually takes around 5 to 10 minutes after the mixture has come to a proper simmer, depending on the batch size.
To maximize the efficiency of the reduction phase, consider the surface area of your cooking vessel. A wide, shallow skillet allows for a much faster evaporation rate than a deep, narrow saucepan. This is particularly helpful if your carrots are already quite tender from the initial cooking phase, as it minimizes their time exposed to the hot sugar, reducing the chance of them breaking down into mush. [3]
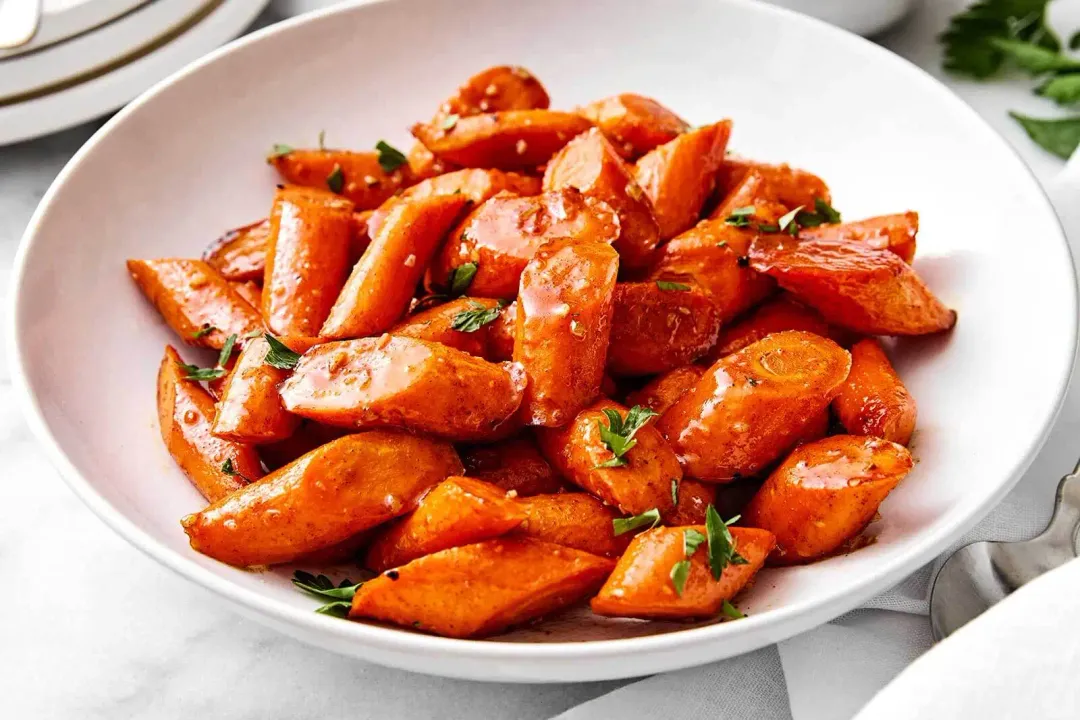
# Final Coating
The final moments in the pan are crucial for achieving that characteristic "glazed" look—a glossy, even coating.
# The Toss
Once the glaze has reduced to a syrupy consistency, the pre-cooked carrots are added back into the pan. [1][8] The heat should be reduced to medium-low. Gently toss or stir the carrots to ensure every surface is coated with the thick liquid. [10] This stirring must be deliberate but gentle; you are coating, not smashing. [9]
As the glaze heats up around the carrots, it thickens further due to the sugar concentration and the slight steaming effect of any remaining moisture from the carrots. The fat (butter) emulsifies beautifully with the reduced sugar and liquid, creating the shine. [2]
# The Garnish
A final flourish often makes the difference between a good side dish and a restaurant-quality presentation. Fresh herbs provide a necessary counterpoint to the intense sweetness and fat. Parsley is the classic choice, adding a fresh green color and a clean, herbal finish. [7][10] Sometimes a sprinkle of fresh orange zest added right at the end can boost the aromatic citrus notes without adding more liquid or sweetness. [4]
If you find your glaze is just shy of perfect—perhaps a bit too thin—you can quickly fix this by turning the heat up slightly for another minute or two and stirring vigorously, or by stirring in a tiny sliver of cold butter off the heat to help create a temporary, stable emulsion (a classic monter au beurre technique adapted for vegetables). [9]
# Variations and Flavor Depth
While the classic brown sugar or honey-orange glaze is popular, the technique remains sound even when swapping out ingredients.
# Beyond the Basic
If you prefer a less intensely sweet profile, swapping out some of the sugar for ingredients with high umami or savory notes can work wonderfully. A teaspoon of soy sauce or Worcestershire sauce, when used judiciously in place of a small amount of water, can deepen the color and complexity without tasting overtly "soy-sauce-y". [2] This savory addition works particularly well if you used vegetable stock during the initial cooking phase. [8]
For a more pungent, adult flavor, using maple syrup as the primary sweetener pairs beautifully with a bit of coarse ground black pepper added during the final reduction. [7]
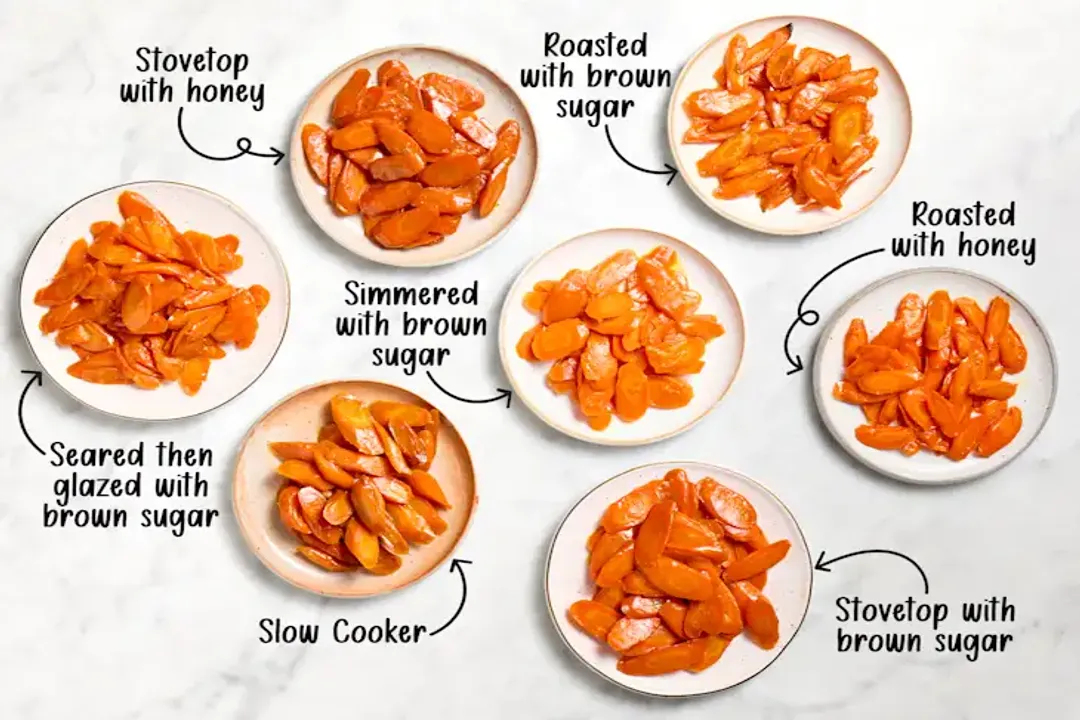
# Texture Comparison Table
Different initial cooking methods lead to varied results, even when the glaze is applied perfectly:
| Initial Cooking Method | Pros | Cons | Ideal Final Texture |
|---|---|---|---|
| Boiling | Fastest overall time | High risk of waterlogging/mushiness | Soft, but still holds shape |
| Steaming | Best flavor retention | Takes slightly longer than boiling | Firm-tender, slight bite remaining |
| Roasting | Adds inherent caramelization | Longest pre-cook time | Slightly chewy exterior, tender interior |
For a weeknight meal where time is the main constraint, steaming the carrots until they are about 80% done and then finishing them in a high-heat glaze reduction works best. [1][3] For holiday meals, taking the time to roast them first yields superior flavor complexity. [3]
The secret, then, is less of a single ingredient and more of a deliberate sequence: ensure uniform size, undercook slightly via steaming or boiling (or pre-roast), allow excess moisture to escape, construct a balanced glaze using fat and acid to temper the sugar, and finally, reduce that glaze slowly until it clings perfectly before a quick, gentle toss. [5][6] When you achieve that sticky, glass-like coating that doesn't drip off into a pool at the bottom of the plate, you've mastered the technique.
#Videos
How to Make Martha Stewart's Brown Sugar Glazed Carrots - YouTube
Related Questions
#Citations
Brown Sugar Glazed Carrots - RecipeTin Eats
The Best (and Easiest) Way to Make Glazed Carrots - The Kitchn
Brown Sugar Glazed Carrots | The Modern Proper
Perfect Glazed Carrots Recipe - Savory Nothings
Two secrets for perfect glazed carrots! #cookingtips #cooking
How to Make Martha Stewart's Brown Sugar Glazed Carrots - YouTube
Best Honey Glazed Carrots (Oven-Roasted) | Downshiftology
Sweet and Buttery Glazed Carrots (15-Minutes) - Familystyle Food
Glazed carrots : r/Cooking - Reddit
Glazed Carrots - Dinner at the Zoo