What is the best way to cook your ham?
Achieving that perfect, succulent baked ham, glistening with a sticky, caramelized crust, often feels like a delicate balancing act between heating it through and turning it into something dry and disappointing. The "best" method truly hinges on the specific ham you purchase—whether it's already fully cooked, partially cooked, bone-in, or a convenient spiral-cut version. For the vast majority of home cooks purchasing a holiday ham, you are dealing with a pre-cooked product. This changes the objective from cooking raw meat to reheating it gently while adding flavor through a glaze.
# Ham Basics
Understanding your ham is the first step toward success. Hams sold in supermarkets are typically cured and fully cooked, meaning they only require reheating to a safe and palatable serving temperature. If you happen to purchase an uncooked or "fresh" ham, the rules change significantly, requiring a much longer cooking time to reach a safe internal temperature, often around or higher depending on USDA guidelines for that specific cut. For the common pre-cooked variety, the goal is usually to heat it to an internal temperature between and . Some sources recommend as an ideal stopping point for maximum juiciness, while others target or .
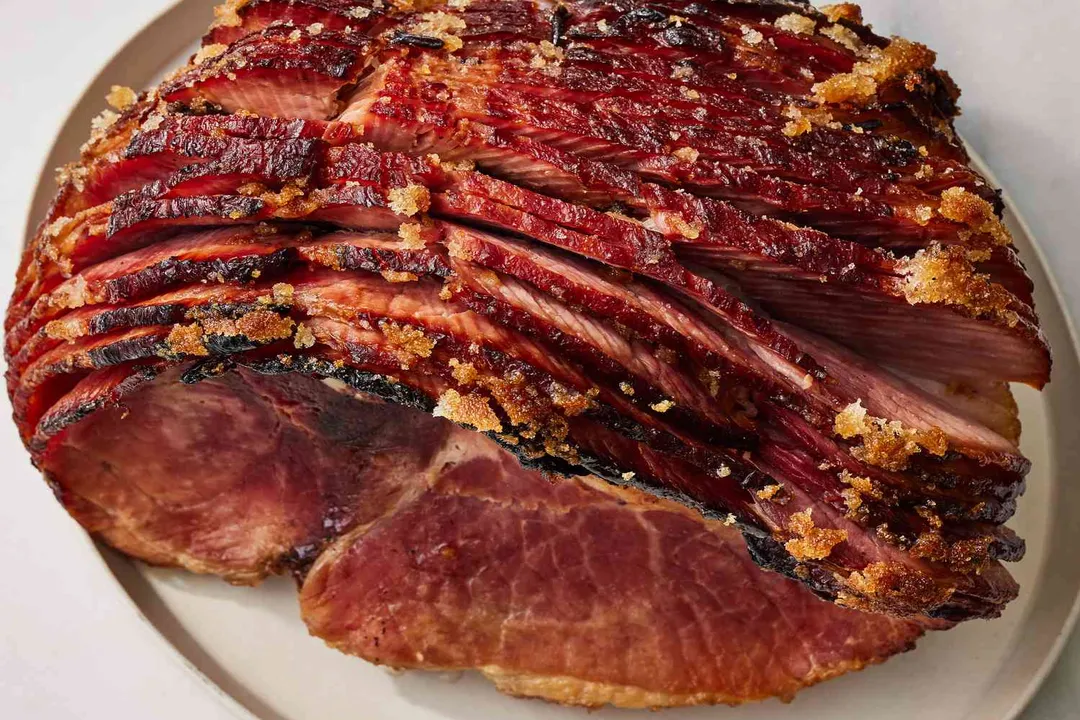
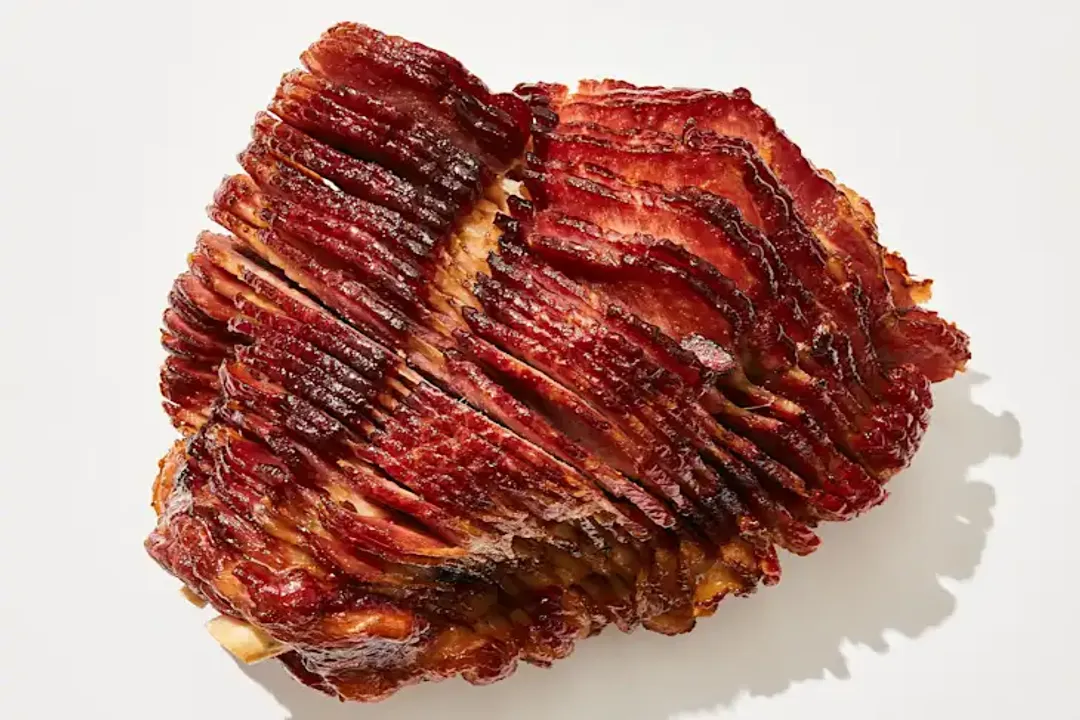
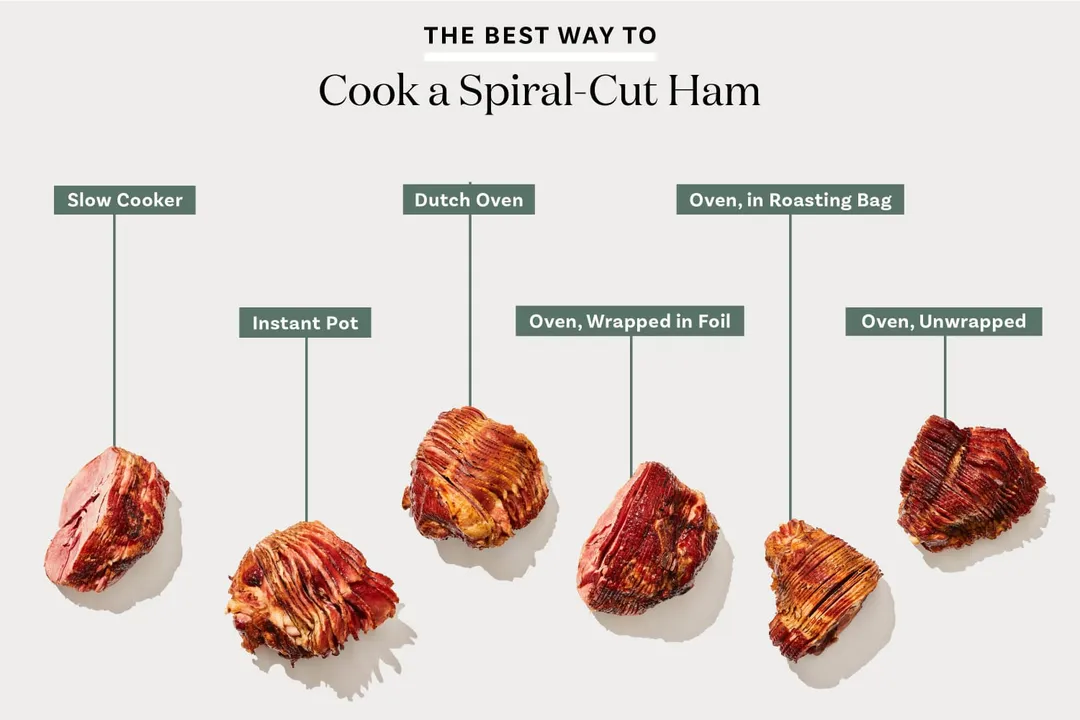
The physical structure of the ham also dictates technique. Bone-in hams often retain more moisture and flavor because the bone acts as an insulator, slowing the cooking process slightly. Conversely, spiral-cut hams are sliced almost entirely through before packaging. While this ensures the glaze penetrates deeply and makes serving incredibly easy, it also means more surface area is exposed to dry heat, raising the risk of the edges drying out before the center is warm. When managing a spiral-cut ham, attentive basting and moisture retention are key. Boneless hams, while convenient for slicing, can sometimes have a slightly more uniform texture that doesn't hold moisture as well as a bone-in counterpart.
# Oven Management
Once you have your ham situated in a shallow roasting pan, moisture management is critical, especially for those pre-cooked varieties you want to keep tender. A frequently cited technique involves adding a small amount of liquid—water, apple juice, or broth—to the bottom of the pan. This liquid creates steam as the ham heats, adding humidity to the oven environment and preventing the meat from drying out during the long reheating period.
The temperature setting for the oven is where opinions diverge slightly, though all fall within a moderate range. Some established guides suggest setting the oven to , while others prefer a slightly higher heat of . For a standard pre-cooked ham, the general rule of thumb suggests planning for about 10 to 15 minutes of cooking time per pound at . If you opt for the setting, the time will be slightly reduced, but you must watch that internal temperature closely.
When dealing with a large, bone-in ham, or if you notice the edges of a spiral-cut ham beginning to brown too quickly or look dry while the center is still cool, you can employ the classic technique of tenting with foil. Covering the ham loosely with aluminum foil shields the exterior from direct, intense heat, allowing the interior to warm evenly without compromising the surface texture. You will remove the foil later to allow the glaze to set properly.
A useful, albeit simple, calculation for planning purposes is to estimate the time needed based on weight. If you have an $8$-pound pre-cooked ham and you are baking at using the higher end of the estimate ($15$ minutes per pound), you are looking at a total baking time of $120$ minutes, or $2$ hours, before you start checking for the final target temperature of to . This calculation serves only as a starting guide; the meat thermometer is the only reliable tool.

# The Art of the Glaze
A baked ham’s signature appeal often comes down to its sweet and savory exterior, achieved through a glaze applied during the final stages of heating. A classic, highly recommended glaze combination leans heavily on brown sugar, providing that deep caramelization.
A foundational brown sugar glaze recipe often calls for:
- Brown Sugar: The base sweetener.
- Mustard: Dijon mustard adds a necessary sharp counterpoint to the sugar's sweetness.
- Acid: Apple cider vinegar provides tang and helps balance the richness.
- Spice: Whole cloves are frequently used, often studded into the ham's fat cap before glazing, though some modern recipes omit them in favor of ground spices.
To prepare the glaze, these ingredients are typically simmered together until they thicken slightly. If you are using a ham with a distinct fat cap, it is often beneficial to score the fat in a diamond pattern before cooking. This scoring allows the glaze to adhere better and penetrate slightly beyond the surface fat. Furthermore, sometimes whole cloves are inserted into the intersections of the scored diamonds for visual appeal and flavor infusion.
The timing of glaze application is crucial for achieving a sticky, caramelized finish without burning the sugar layer. You should not apply the glaze right at the start of the reheating process. Wait until the ham is within about $30$ minutes of reaching your target internal temperature. At this point, remove the foil (if used), brush a generous layer of glaze over the entire surface, and return the ham to the oven. Depending on the thickness of your glaze and the heat of your oven, you may need to reapply the glaze every $10$ to $15$ minutes for the remaining time. This repeated application builds up layers of sweet, browned crust. If you find your glaze is running off too quickly, consider simmering it a bit longer on the stovetop to ensure a thicker consistency before basting.
A practical approach involves creating a simple basting schedule tied to temperature milestones. For instance, if your goal is , apply the first layer of glaze when the thermometer reads to . Then, baste every $10$ minutes until you hit the final temperature, ensuring you’ve built up a good crust just as the interior finishes heating.
# Reaching The Finish Line
The internal temperature is the non-negotiable factor that dictates doneness and safety, especially when reheating a pre-cooked ham. You must insert a meat thermometer into the thickest part of the ham, avoiding contact with the bone, as the bone will register a higher temperature, leading you to pull the ham out prematurely. As mentioned, the safe zone for a pre-cooked ham is often cited as to . Stopping at the lower end, around to , is often favored by those prioritizing maximum moisture retention, as the temperature will continue to rise a few degrees during the resting period.
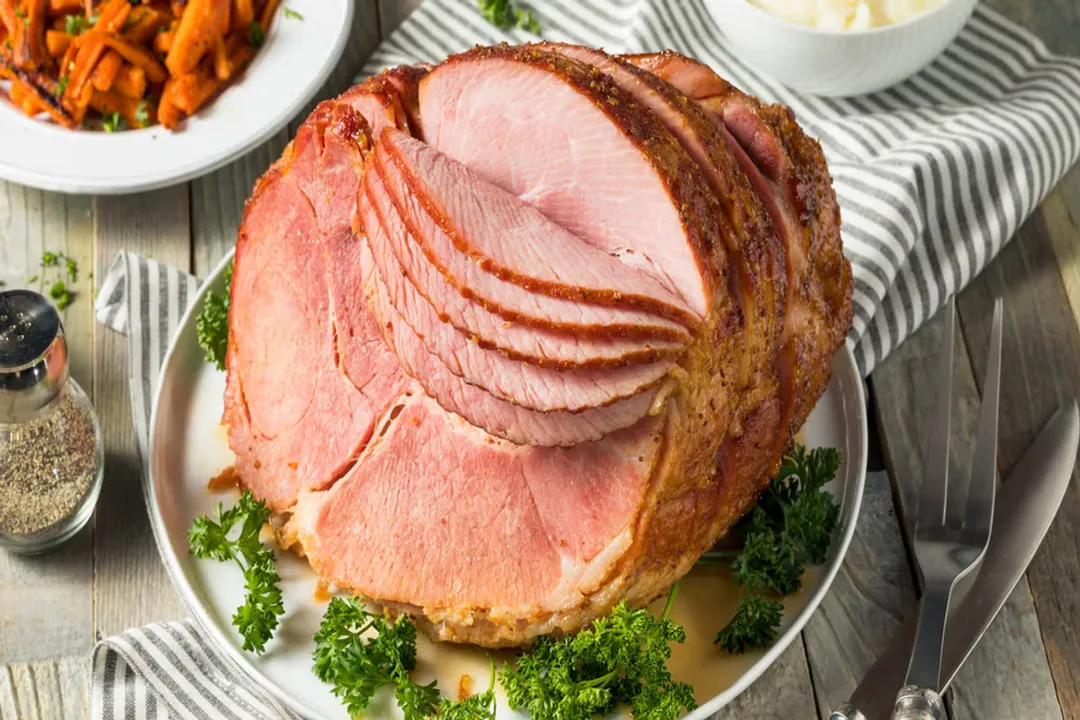
Once the desired temperature is reached—perhaps —immediately remove the ham from the oven. This is when the crucial resting period begins. Resting allows the muscle fibers, which tightened during heating, to relax and reabsorb the juices that have been pushed toward the center. If you slice into a hot ham straight from the oven, those precious internal liquids will spill out onto the cutting board rather than remaining in the meat. Tent the ham loosely with foil again and let it rest on the counter for at least $15$ to $20$ minutes before carving. This resting time is essential for transferring the residual heat throughout the meat and ensuring a juicy final product.
# Maximizing Drippings
What about the flavorful liquid left in the bottom of the roasting pan? This is liquid gold, especially if you added broth or juice at the start. Do not discard this mixture. After you remove the ham to rest, carefully pour the pan drippings through a fine-mesh strainer into a separate container to remove any cooked-on bits or spices. This rendered liquid can be used as a base for a simple, deeply flavored gravy or simply drizzled over the carved slices of ham before serving. A small, practical tip to enhance this step is to keep a small amount of broth handy during the baking process; if the pan liquid seems to evaporate too quickly or looks too dark near the end, adding a fresh splash of liquid can help salvage the remaining flavor components for your gravy base.
# Cuts and Serving
Whether you opt for bone-in or boneless, the process of carving affects presentation and service. A bone-in ham will require you to carve along the bone structure, which can be slightly tricky but often yields more uneven, rustic slices. A pre-sliced, spiral-cut ham requires almost no effort on your part, as the slices are already separated by the cut, ready to be pulled away. When serving, arranging the slices attractively on a platter and perhaps scattering a few fresh herbs like parsley around the base can improve the visual appeal, complementing the glossy glaze. Ultimately, the best way to cook your ham combines respecting the cut you have, maintaining moisture integrity throughout the slow reheat, and expertly managing the glaze application in the final moments.
#Videos
The BEST Honey Glazed Ham | How to Make Honey Baked Ham
Related Questions
#Citations
Simple Baked Ham with Brown Sugar Glaze | Alexandra's Kitchen
Baked Ham with Brown Sugar Glaze - Spend With Pennies
How to Cook a Ham - Glazed Bone-In Ham Recipe
First Time Cooking A Ham - Any Tips, Guidance or Suggestions ...
How to cook flavorful ham? - Facebook
The BEST Honey Glazed Ham | How to Make Honey Baked Ham
How to Cook a Spiral Ham (THE Best Way) | The Kitchn
Baked Ham Recipe - Allrecipes