Do you stratify in the freezer or fridge?
Deciding where to place your seeds for their necessary chilling period—the refrigerator or the freezer—is a common point of anxiety for gardeners attempting cold stratification. This process, essential for many native plants and other species whose life cycle depends on experiencing a natural winter, requires mimicking the cold, moist conditions seeds would encounter naturally before they can germinate [cite: bloomingbackyard.com/cold-stratification-seeds/]. The fundamental difference in outcome often hinges on whether the seed is merely chilled or actually frozen.
# Cold Requirement
Many seeds, especially those from temperate or colder climates, possess an internal mechanism that prevents germination until they have been exposed to cold temperatures for a specific duration [cite: americanmeadows.com/blogs/wildflower-seeds/how-to-cold-stratify-seeds/]. This evolutionary safeguard ensures they don't sprout in autumn only to be killed by the first hard frost. Stratification essentially "tricks" the seed into believing winter has passed. This chilling requirement is categorized as cold stratification (or sometimes winter stratification) [cite: bloomingbackyard.com/cold-stratification-seeds/].
# Refrigerator Standard
The refrigerator is generally considered the safest and most recommended environment for executing cold stratification [cite: growingfruit.org/t/how-to-cold-stratify-seeds/55903]. The primary objective here is to maintain a consistent, cool, but above-freezing temperature [cite: permies.com/t/143066/Stratifying-seed-freezer].
For most standard household refrigerators, this temperature hovers between and (about to ) [cite: growingfruit.org/t/how-to-cold-stratify-seeds/55903]. This range effectively slows down metabolic processes without halting them completely or causing ice crystal formation within the seed embryo, which is the real danger [cite: youtube.com/watch?v=-j-rXMRfV_c].
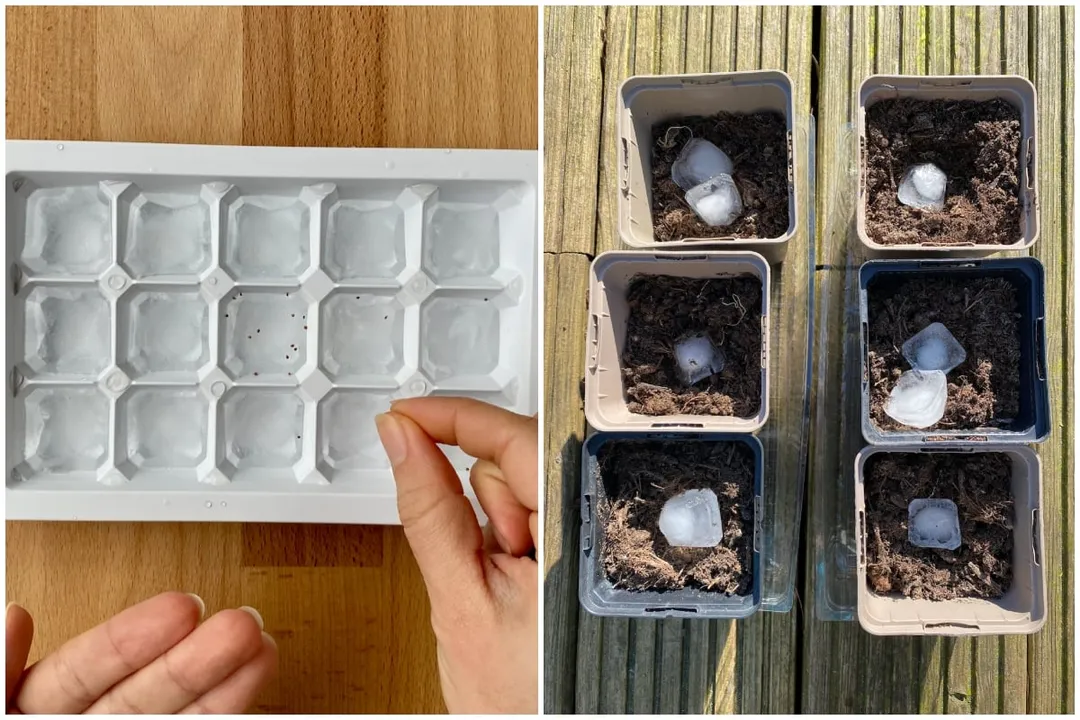
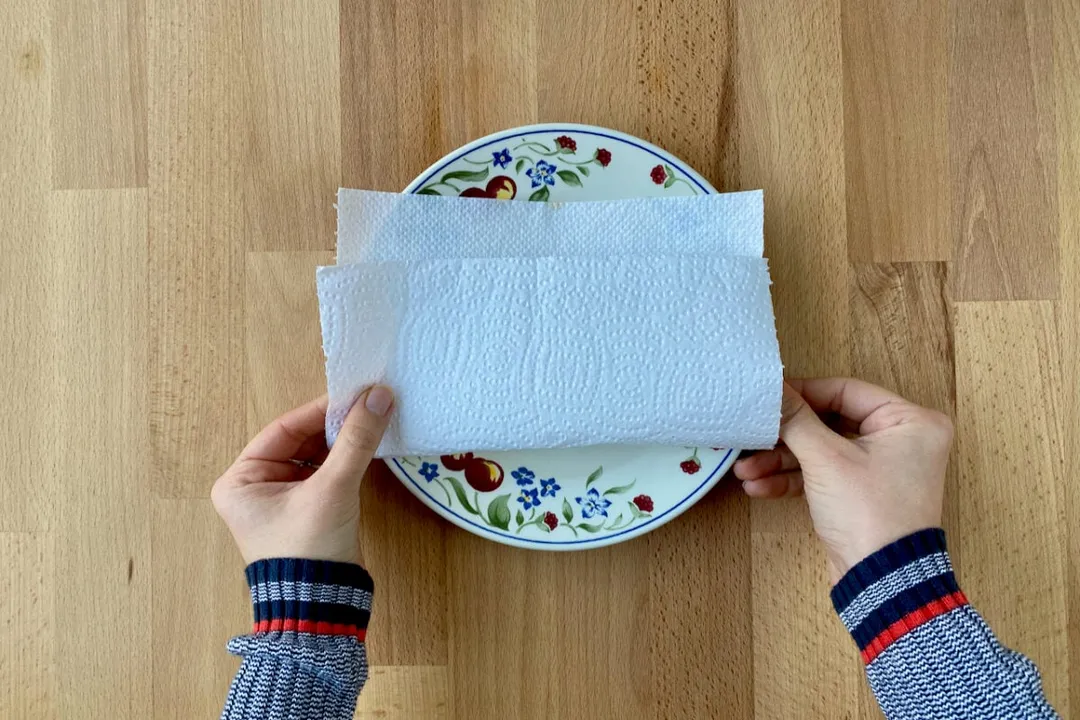
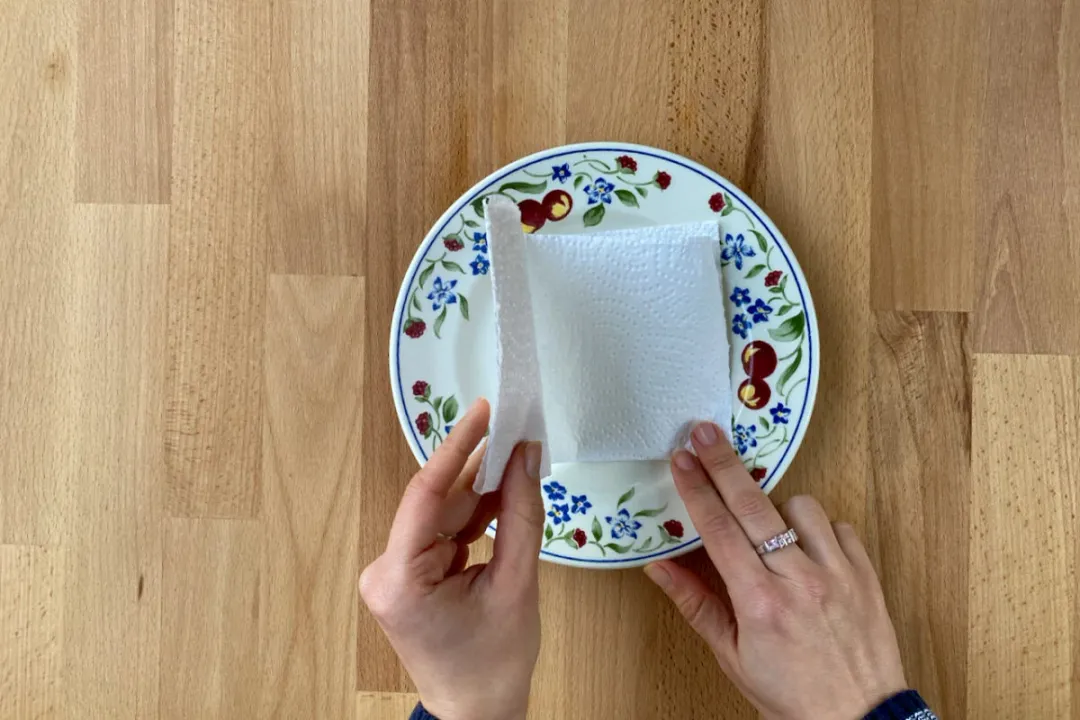
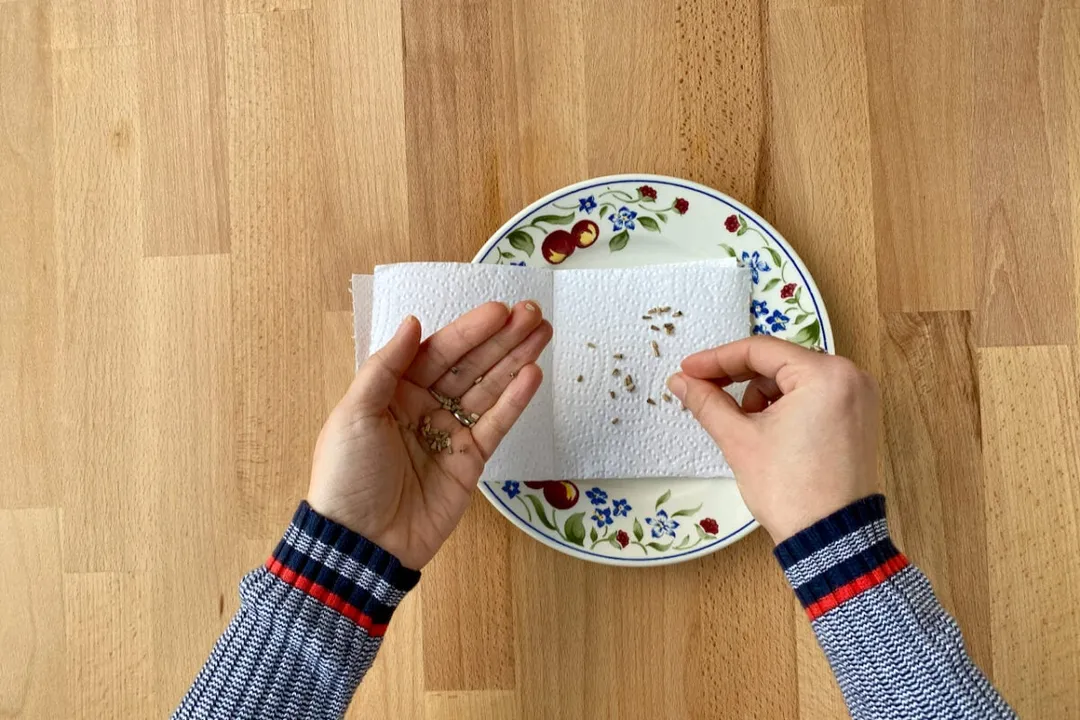
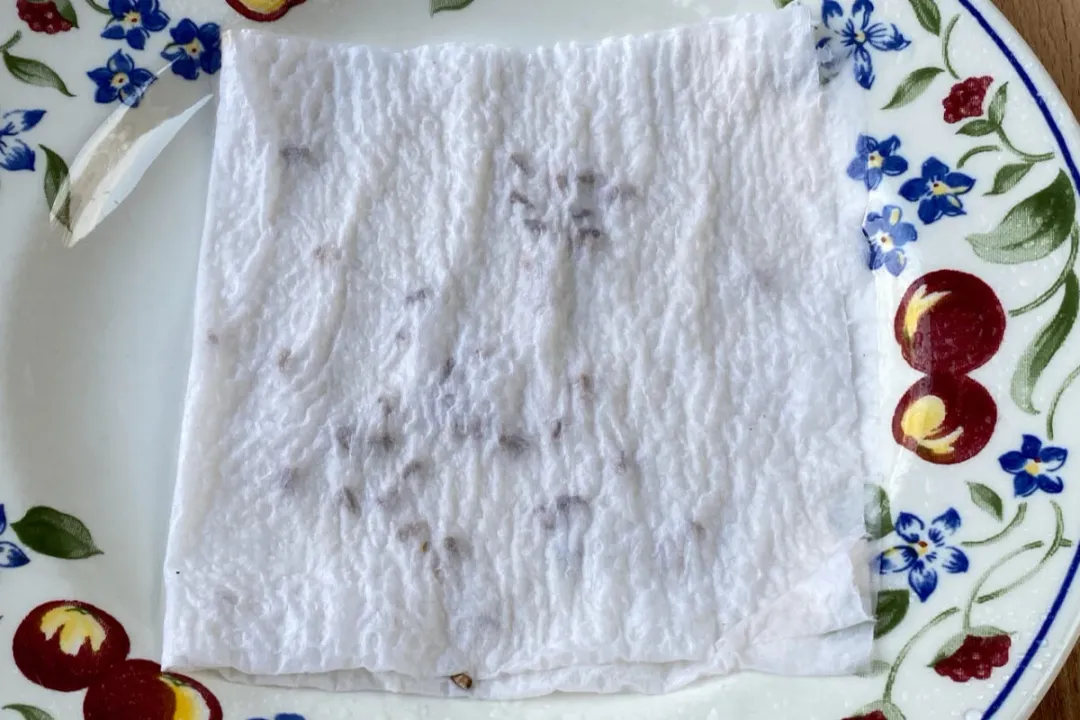
The typical method involves mixing the seeds with a sterile, moist medium. Popular choices include sterilized sand, peat moss, vermiculite, or even simply placing them between damp paper towels [cite: bloomingbackyard.com/cold-stratification-seeds/][cite: americanmeadows.com/blogs/wildflower-seeds/how-to-cold-stratify-seeds/]. They are then sealed in a clearly labeled, breathable container, like a zip-top bag with a few pinholes for gas exchange, and placed in the fridge [cite: bloomingbackyard.com/cold-stratification-seeds/].
A key practical tip when using the fridge is to avoid the back wall, especially in older or less-efficient models. That area is often the coldest and most prone to frost buildup or temperature dips near freezing, which, while perhaps not immediately fatal, can complicate the process if the moisture level is already high [cite: facebook.com/groups/791197578811892/posts/1469775847620725/].
# Freezer Dynamics
The idea of using the freezer often arises from a desire to either shorten the required time or to mimic the more extreme, fluctuating cold of an actual winter environment [cite: reddit.com/r/NativePlantGardening/comments/17v7jxu/cold_stratifying_in_the_freezer_instead_of_the/]. Discussions among experienced gardeners reveal this is where opinions diverge significantly.
The consensus is that the standard freezer setting, typically (around ), is too cold for most seed stratification protocols [cite: permies.com/t/143066/Stratifying-seed-freezer]. Seeds need cold moisture, not a completely frozen state. If the medium—especially if it's just paper towels—freezes solid, the water within the seed cells turns to ice. This expansion can rupture the cell walls, permanently damaging or killing the embryo [cite: youtube.com/watch?v=-j-rXMRfV_c]. One gardener noted on a forum that they had success by placing seeds mixed with peat near the door of the freezer, where temperatures fluctuated more, but cautioned against placing them deep inside [cite: reddit.com/r/NativePlantGardening/comments/17v7jxu/cold_stratifying_in_the_freezer_instead_of_the/].
Some niche protocols might suggest short bursts of deep cold followed by warmer periods, but for the average gardener seeking reliable results for their first stratification attempt, the freezer remains a high-risk zone. If one must use a deep-freeze unit, it's generally recommended only for seeds known to require very intense chilling, and only then by monitoring the temperature carefully, perhaps setting the unit significantly warmer than its default setting [cite: permies.com/t/143066/Stratifying-seed-freezer].
# Comparing Locations
The choice boils down to control versus mimicking intensity.
| Feature | Refrigerator (Fridge) | Freezer (Default Setting) |
|---|---|---|
| Temperature | to (Above freezing) [cite: growingfruit.org/t/how-to-cold-stratify-seeds/55903] | Typically or below (Well below freezing) |
| Risk of Damage | Low, provided moisture isn't excessive (leading to mold) | High, due to potential for cellular ice crystal formation |
| Metabolic State | Slowed, but potentially active enough to break dormancy | Near total cessation; risk of irreversible freezing |
| Reliability | High; standard for most stratification types | Low; requires specialized temperature control or placement |
If you look at seed packets or guides for species like many oaks, maples, or certain wildflowers, the required stratification period is listed in weeks or months at refrigeration temperatures [cite: americanmeadows.com/blogs/wildflower-seeds/how-to-cold-stratify-seeds/]. It is rare to see a standard guide recommending a deep freezer unless specifically addressing species adapted to truly arctic or sub-zero winters, and even then, the exact parameters are usually specified [cite: youtube.com/watch?v=W5c5G4i3VSs].
It's worth considering your local climate's natural winter profile. If you live in a region that rarely sees temperatures dip below (about ) for any sustained period, attempting to perfectly mimic a harsh Canadian winter in your freezer might actually be detrimental; the consistency of the slightly warmer fridge might better reflect the average chilling required [cite: facebook.com/groups/824954614321076/posts/3038273146322534/]. The goal is biochemical change, not just temperature deprivation.
# Execution Checklist
Regardless of whether you choose the proven route (fridge) or the riskier path (carefully managed freezer section), the initial setup must be precise to ensure success.
- Source Verification: Confirm the exact chilling duration required for your specific seed type. This can range from 4 weeks to 16 weeks [cite: bloomingbackyard.com/cold-stratification-seeds/].
- Medium Moistening: Prepare your substrate (peat, sand, vermiculite). It should be moist, not soaking wet. A good test is to squeeze a handful; only a drop or two of water should emerge. Excess water invites anaerobic bacteria and mold [cite: growingfruit.org/t/how-to-cold-stratify-seeds/55903].
- Mixing: Thoroughly mix the seeds into the damp substrate. For smaller batches, the damp paper towel method is efficient, but ensure the towels are consistently damp throughout the process.
- Containment and Labeling: Place the mixture into a sturdy, sealable bag or container. This step is non-negotiable for organization: use a permanent marker to clearly label the bag with the Species Name, the Date Started, and the Required End Date. Storing bags of unlabeled, chilled soil is a recipe for mystery sprouts come spring.
- Placement: Place the container in the chosen location (preferably the fridge). If using the fridge, consider placing the bag inside a slightly larger, open container to catch any condensation leaks, though this is optional.
# Monitoring and Maintenance
Once the seeds are chilling, you must resist the urge to check them every day, which can disrupt the temperature stability. However, checking them periodically (perhaps weekly) is necessary to ensure the medium hasn't dried out or, conversely, developed mold [cite: americanmeadows.com/blogs/wildflower-seeds/how-to-cold-stratify-seeds/].
If you see white, fuzzy growth (mold), immediately open the container, gently aerate the contents, and perhaps introduce a tiny amount of fungicide or simply replace the overly damp substrate with fresh, sterile, slightly drier material. This check is especially crucial if you are using the paper towel method, as these dry out faster than bulk mediums like peat.
Another important maintenance step, often overlooked when dealing with longer stratification periods, involves checking for premature germination. If you notice small roots emerging before the scheduled end date, you must plant those seeds immediately into a starting medium, regardless of the overall schedule. They have broken dormancy and now require light and soil to continue developing [cite: youtube.com/watch?v=W5c5G4i3VSs].
# Post-Chilling Action
When the required chilling time has passed, you must remove the seeds promptly. Leaving them cold for too long can sometimes simulate an extended winter, leading to secondary dormancy, where the seed now requires a warm period before it will sprout—a phenomenon known as warm stratification following cold stratification [cite: bloomingbackyard.com/cold-stratification-seeds/].
After removal, seeds mixed in a medium (sand, peat) should generally be sown directly into their final pots or trays, still lightly covered with the chilling medium or a thin layer of fresh seed-starting mix. Avoid washing off all the substrate; some residual material can actually help the seed settle into its new environment.
If you used the paper towel method, gently remove the seed, press it onto the surface of your starting mix, and cover it with a very thin layer of soil, or simply press it in lightly. At this stage, the seeds need warmth (usually to , or to ) and consistent moisture to trigger germination. They have already completed their winter requirement; now they need their spring cue [cite: americanmeadows.com/blogs/wildflower-seeds/how-to-cold-stratify-seeds/].
To minimize the risk of mixing up chilling times, especially if you are running multiple stratification projects simultaneously—say, two species needing 60 days and one needing 90 days—implement a color-coding system alongside your permanent labels. For instance, red tape for 60-day runs, blue tape for 90-day runs. This visual cue, especially when rummaging through a cold, dimly lit refrigerator, can prevent you from pulling a bag too early or leaving one in too long [cite: original insight]. Always keep the planting schedule near your seed starting area so you know exactly when to move things from cold storage to the warmth of the propagator or sunny windowsill.
Ultimately, while the allure of the freezer might suggest a quicker or deeper chill, the refrigerator offers the controlled, consistent, above-freezing temperatures that reliably break dormancy for the vast majority of species requiring this treatment. Treat the freezer as an advanced technique reserved only for species known to require near-freezing temperatures, and only then with significant caution and temperature monitoring.
#Videos
A Better Way to Cold Stratify Seeds for Faster Germination - YouTube
How I Artificially Cold Stratify Native Plant Seeds using ... - YouTube
Related Questions
#Citations
Cold stratifying in the freezer instead of the fridge - Reddit
6 Ways to Cold Stratify Seeds (& 36 Plants That Need Stratification)
A Better Way to Cold Stratify Seeds for Faster Germination - YouTube
Can cold stratification be done in a refrigerator? - Facebook
Stratifying seed in the freezer (trees forum at permies)
How To Cold Stratify Seeds For Spring Planting - American Meadows
How to cold stratify seeds? - General Fruit Growing